Step by step installation instruction for MS Access to MySQL database converter software
Installation Instructions
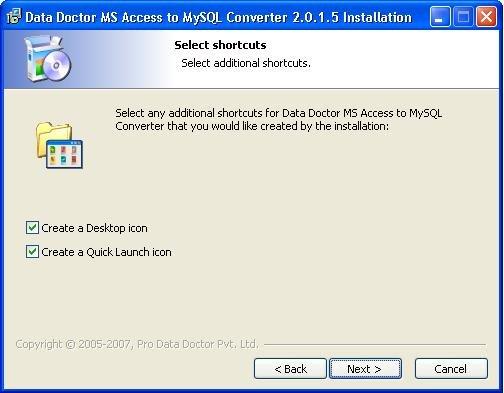
You can select additional shortcuts (like creating Desktop icon or Quick Launch icon) of the software which will be created during installation.
Click on “Next” button to continue the process.
Step5-> On clicking “Next” button, the “Ready to Install” screen will be appeared:

Now the setup is ready to install on your computer. Click on “Install” button to install the software or click on “Back” button, if you want to change any settings.
Introduction

Software Installation Guide
Software Version Information
Describing the Software
Working with Software
License and Ordering
FAQs and Troubleshooting
Getting Assistance
Quick Reference